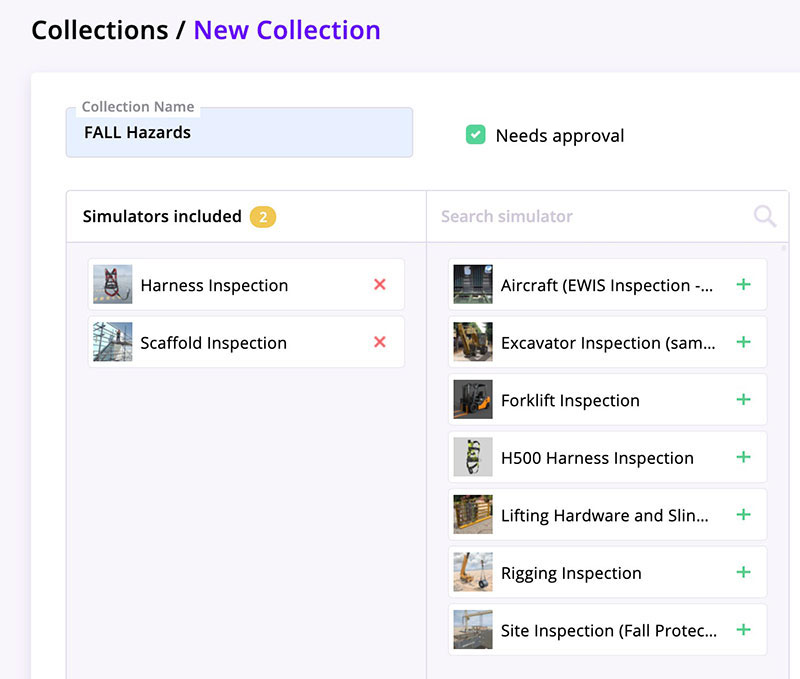
Creating a collection

A collection is a set of simulators that you group together in order to easily share them with a group of instructors.
How to create a collection
- Go to the Collections section and click "Add a Collection".
- Assign a name to the collection.
- Keep the box "Needs approval" checked if you want students access to be granted by the instructors (read more here.)
- Add simulators by dragging them to the column "Simulators included", or by clicking the green '+'.
- Check the box next to the name of each instructor who should have access to the collection.
- Click Save at the bottom of the screen.
As soon as a user is granted access to a collection, the corresponding QR code appears in his section "My profile".
Assign instructors in bulk to a collection
If you wish to authorize a large number of instructors to access a collection, you may prefer a bulk operation. To do so:
- Create your list of instructors in .csv format (see how to proceed here).
- Drag and drop your .csv file to the left box, under the list of simulators.
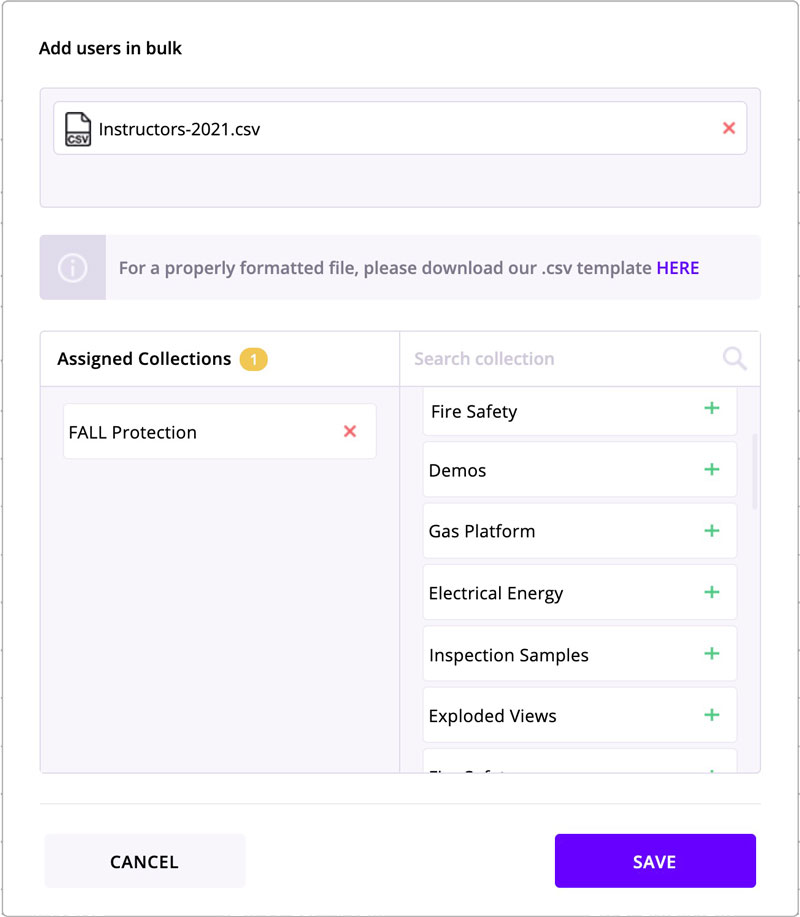
- Click Save at the bottom of the screen.
- Once the import is completed, all the new instructors in your list will automatically receive by email the QR code granting them access to the collection.
QR codes won't be automatically emailed to instructors who are already present in your Senar database. Please consult this article to learn how to access and share QR codes with these instructors.