Getting started with SENAR Studio (Manager)

In SENAR Studio, you can create collections of AR simulators, grant access to your instructors and consult analytics.
Here's how to get started in 3 easy steps:
STEP 1: Add Instructors
- Go to the Users section and click "ADD USER(S)", then select Add user.
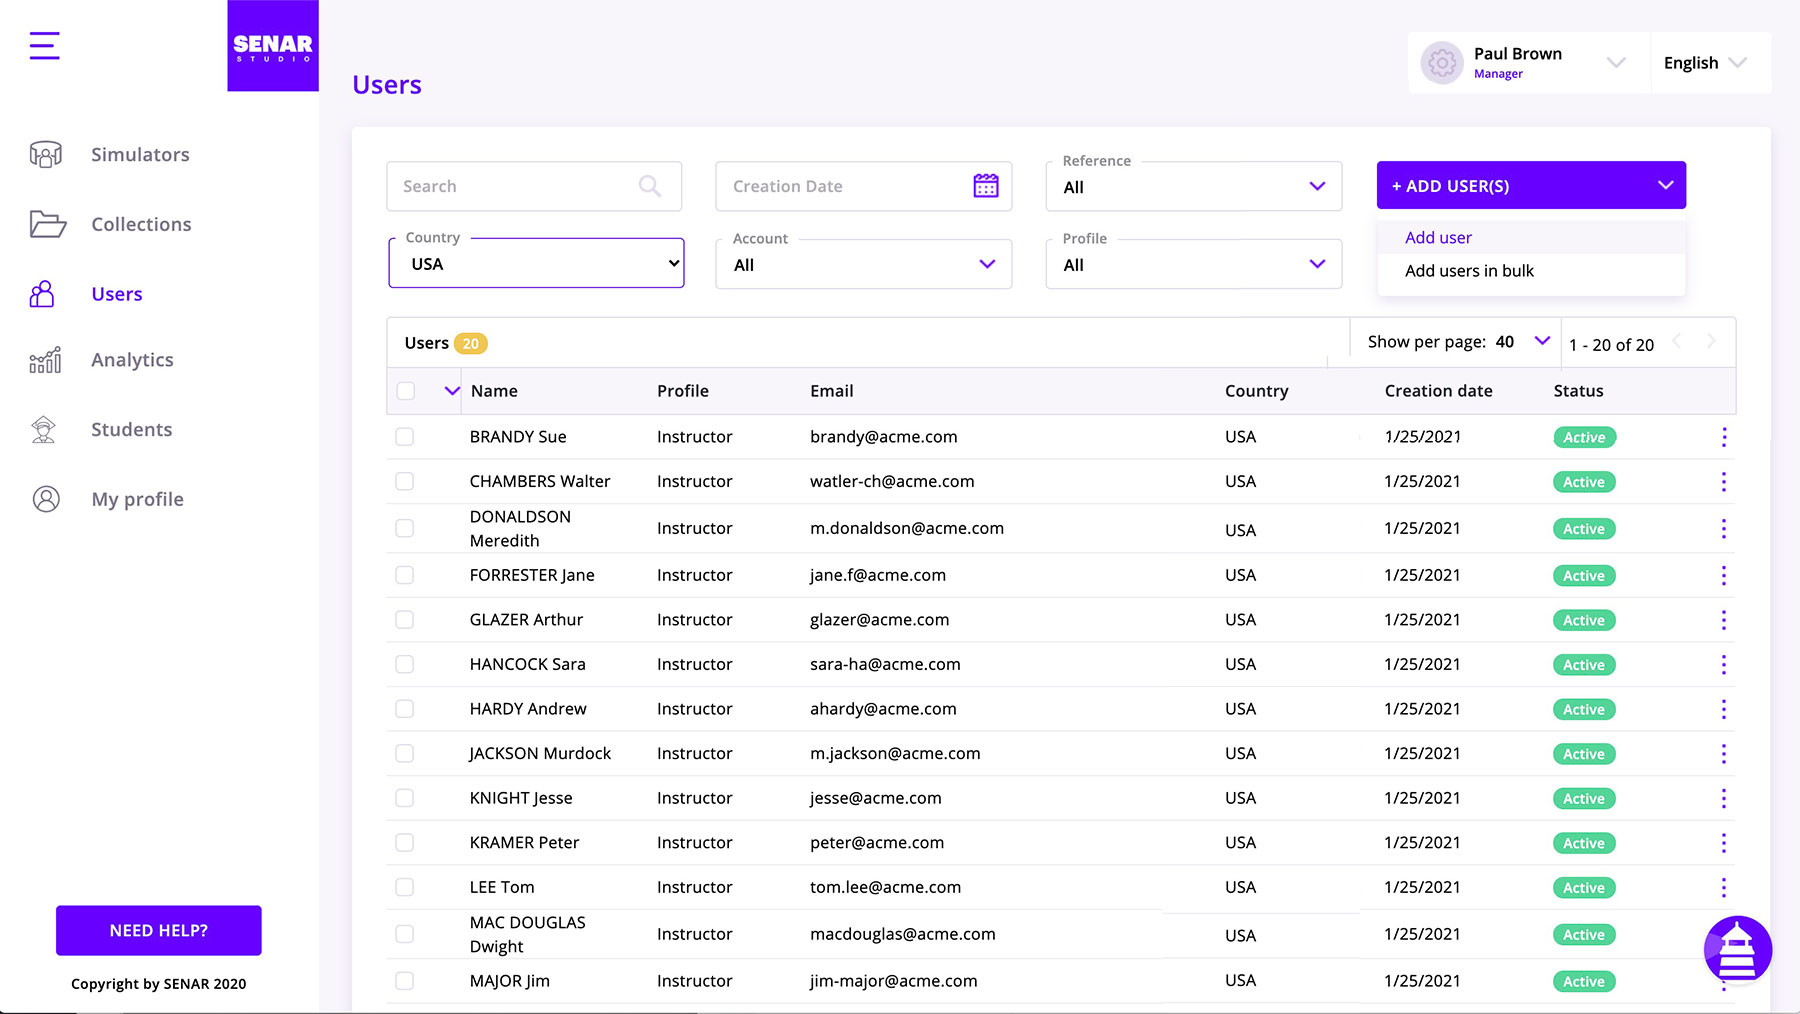
- Complete a profile for each instructor. They will automatically receive an email inviting them to create their SENAR password.
Note: the "Reference" field is optional. It offers you an additional sort key in reports. For example, you may want to enter a region or cost center code, depending on what is relevant to your organization.
STEP 2: Add Collections
- Go to the Collections section and click "ADD A COLLECTION"
- Assign a name to the collection.
- Keep the box "Needs approval" checked if you want student access to be granted by the instructors (read more here.)
- Add simulators by dragging them to the column "Simulators included", or by clicking the green '+'
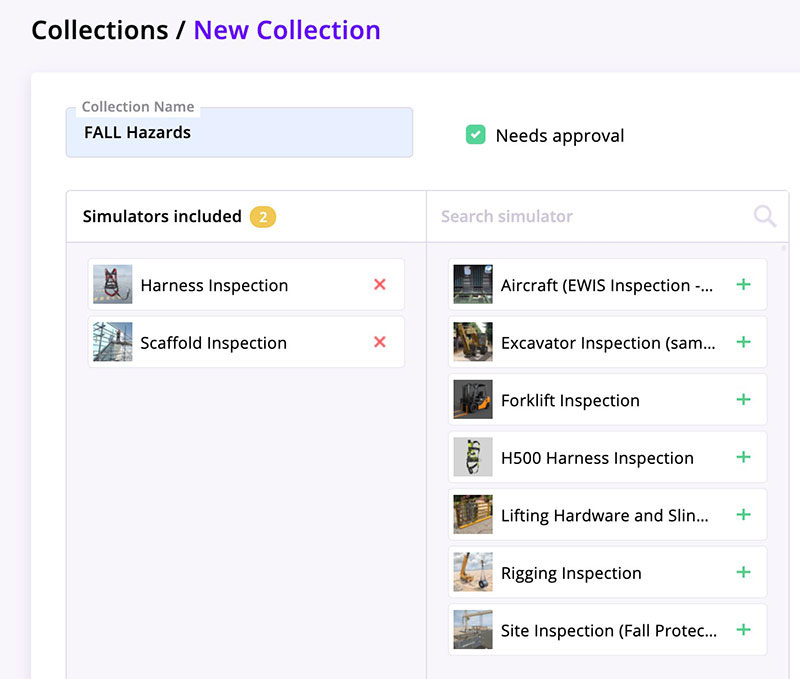
- Check the box next to the name of each instructor who should have access to the collection.
- Click Save at the bottom of the screen.
STEP 3: Share QR codes with instructors
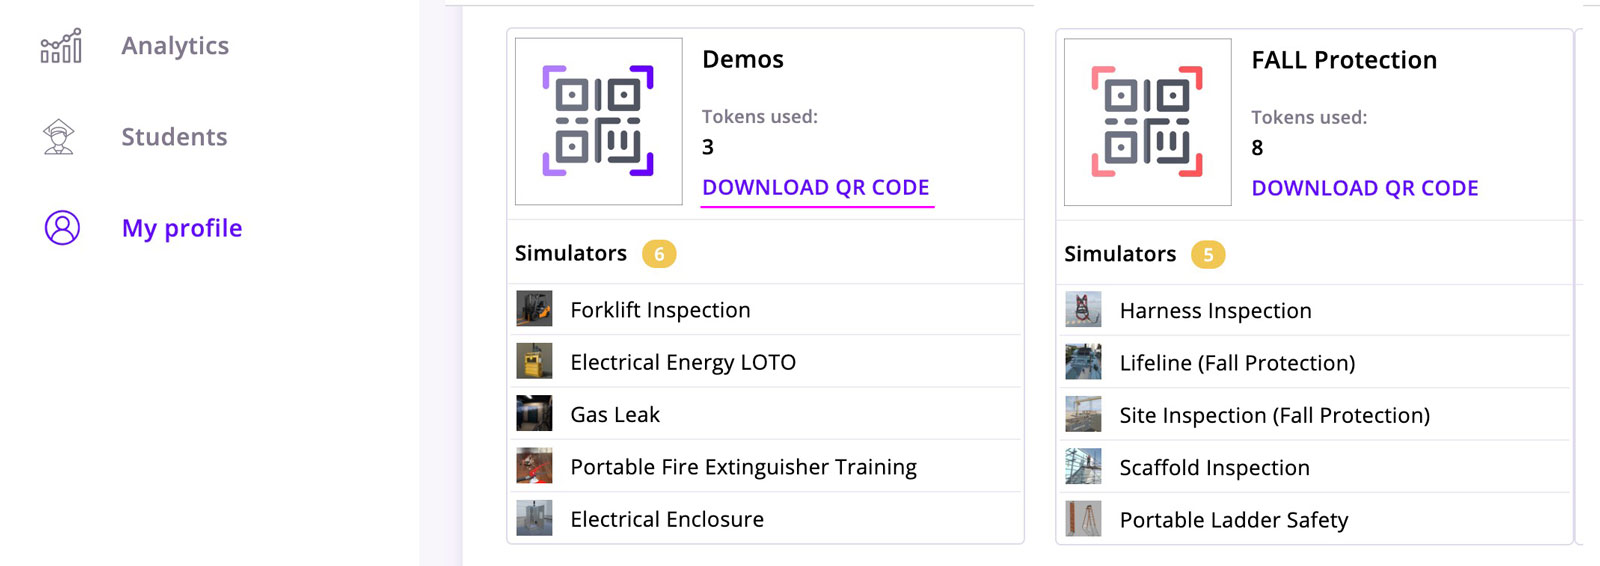
Each instructor can download their QR Codes from SENAR Studio, under "My profile".
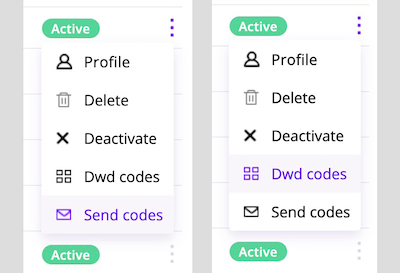
You can also provide your instructors with their QR codes yourself. From the "Instructors" section of SENAR Studio, you can:
- Have an e-mail including the QR codes sent to the instructor.
- or Download your instructor's QR codes, to share them your own way.
Both options are available by clicking the 3-dot button located at the right end of an instructor's row:
STEP 4: Add Managers (optional)
If you want coworkers to help you manage your organization, you can add Managers.
To do so, simply follow Step 1, and select "Manager" from the drop-down list of the user profile.