Exporting a 3D Model from SketchUp

1. SET YOUR MODEL
Before exporting a 3D model from SketchUp for use in SENAR WalkIn, please ensure the following points:
- Ensure your model is built to the correct scale.
- Place your object at the origin (0.0.) coordinate system in the scene.
- Ensure the base of your model (e.g., the floor of the house) aligns with ground level. Do not place the model on a raised platform.
- Locate the pivot point at the center of the model.
- Convert TGA textures to PNG.
- Ensure that texture paths are relative.
2. EXPORT YOUR MODEL
To export your SketchUp model:
- Go to the "File" menu and select "Export" > "3D Model".
- Choose the OBJ or FBX file type.
- Select "Options" from the drop-down list.
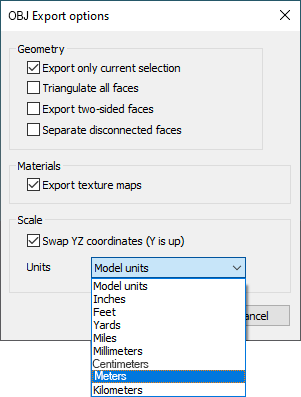
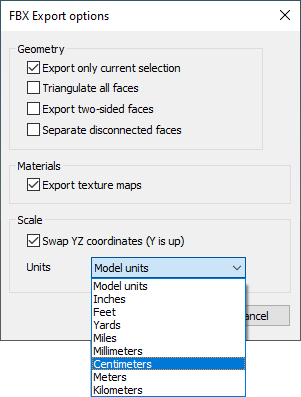
In the Export options:
- Check "Export only current selection" if you've made a selection before beginning the export process. If you leave this option unchecked, the entire model will be exported.
- Check "Export texture maps" to export textures applied to faces with your OBJ file.
- Check "Swap YZ coordinates (Y is up)"
- In the Units dropdown:
- If you are exporting as an OBJ, choose "Meters"
- If you are exporting as an FBX, opt for "Centimeters"
 |  |
3. PREPARE YOUR FILE FOR UPLOAD
After exporting your model and textures, prepare your file for upload as follows:
OBJ: Create a ZIP that should contain, at the root level:
- A single OBJ file
- The .mtl file
- A folder containing the textures.
FBX: You can create either a textured FBX or a ZIP file. The latter should contain, at the root level:
- A single FBX file
- A folder containing the textures.
Finally, upload your file to SENAR WalkIn.